The prawn & the cocktail

IMG_2515

Any guesses as to why I woke up so unnecessarily early this morning?

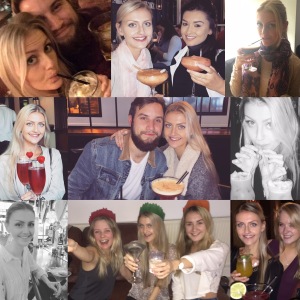
It’s another fuzzy-head Saturday morning, and although I am in desperate need of tea & toast, I am definitely making the most of this lie in! This week has been pretty non-stop. My parents came to the city and between the coffees & cocktails we managed to catch up on life, the universe and everything! Sometimes a little slice of home is just what you need. But being totally out of routine this week has meant squeezing in yoga & the gym between lectures and having to get a bit creative when it came to meal times – basically trying to use up everything and anything in the fridge! So there was definitely a theme to my make-shift meals.

As long as I have my kitchen basics I can usually come up with something satisfying – spinach, avocado, eggs, bananas, oats, hummus & chili flakes are my absolute essentials when it comes to the weekly shop. After these it’s just a case of choosing extra fresh veg, fruit & meat/fish or stocking up on cupboard essentials like wholegrain rice, quinoa, pasta and bread. At the beginning of this week I had some real cravings for mango and prawns, and not as individual ingredients but the actual combination of the two! Who knows why, foodie’s brains work in mysterious ways. So here’s how I satisfied this Caribbean craving:

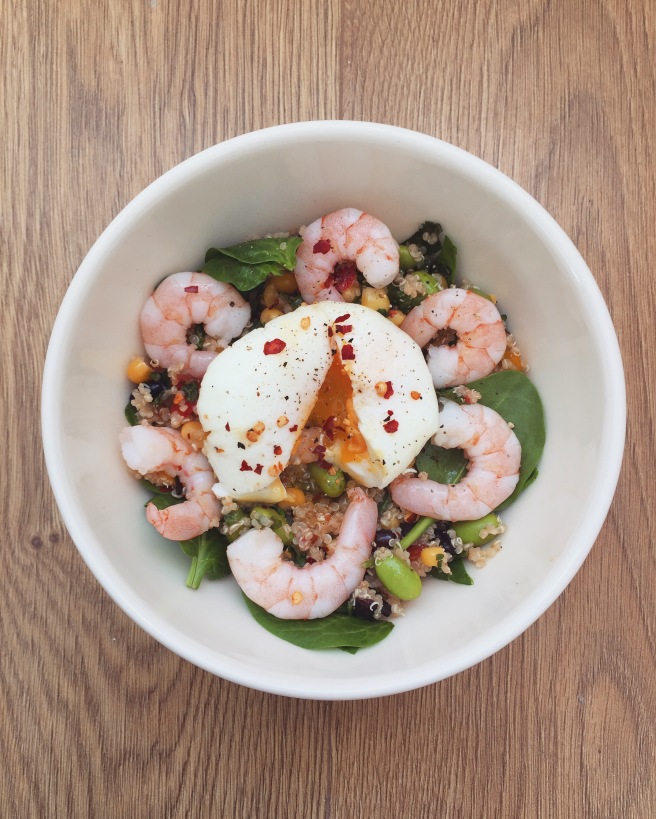
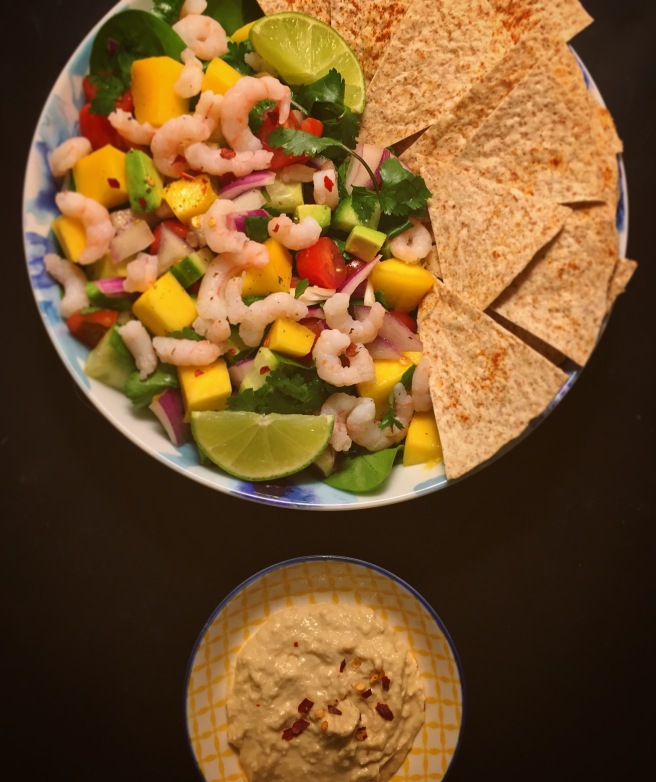
Mango-shrimp salad (with homemade tortilla chips & avo-salsa): (Serves 1)

This salad is so fresh and bursting with flavour, it’s dairy free and can easily be made gluten free by substituting the wholewheat tortilla for a GF version. Adding a little fruit to your salads is a really delicious way to pack your meals with antioxidants and also satisfy that sweet-tooth! This is also a really quick and easy weekday meal that can be thrown together whilst the tortilla chips bake, a true bowl of love.

IMG_2530.JPG

  • 1 serving of deliciously chunky avo-salsa (recipe link here!)
  • 1 wholewheat tortilla wrap
  • 2 lime wedges
  • 1/2 cup mango, chopped
  • 1 small extra handful of fresh coriander leaves, torn/roughly chopped
  • 1/2 pack of small prawns (I tend to rinse them before adding)
  • 1 big handful of spinach, roughly chopped
  • cucumber, chopped into small quarters
  • 1 tbsp mixed omega-3 boosting seeds – optional (e.g. sunflower, sesame, chia)
  • sprinkle of paprika
  • sprinkle of dried chili flakes
  • 1 tbsp hummus
  • Salt & pepper

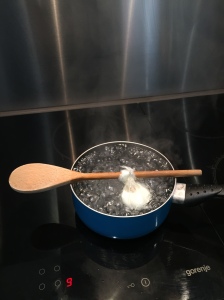
For the tortilla chips:

Preheat the oven to 120°C (fan). Slice the tortilla like a pizza into triangles and spray/drizzle over a little extra virgin olive oil (or other oil of your choice!). Line a baking tray with parchment paper or foil and place the triangles evenly onto the tray with spaces in between. Sprinkle over some paprika, salt & pepper. Leave to bake for around 20 mins until the tortilla crisps up a bit – keep an eye on them for burning!

For the salad: 

This part is super easy – just combine all of your chopped ingredients with the avo-salsa mix, prawns and mango, and season to your liking with a few lime wedges, S&P, chilli flakes and maybe some paprika & hummus. Sprinkle over some superfood seeds and get creative with it – add in whatever you fancy! You might have some extra veg that needs using or maybe some healthy & refreshing homemade tzatziki (link here!). 

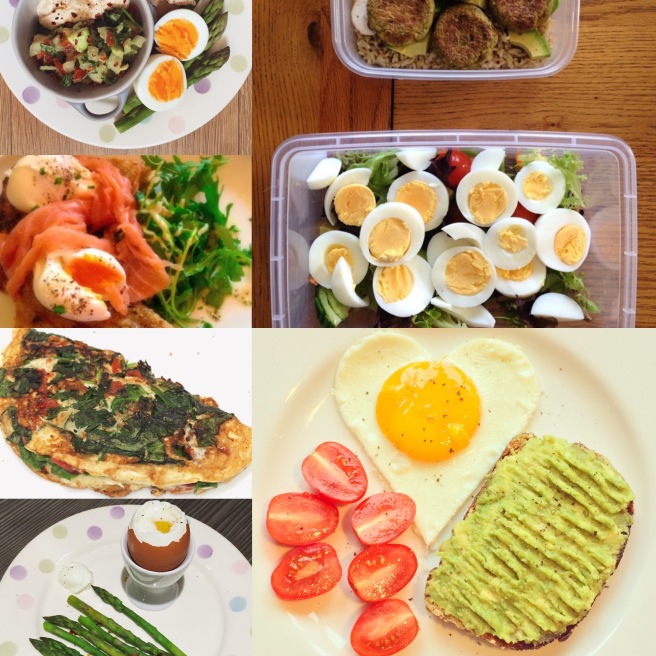
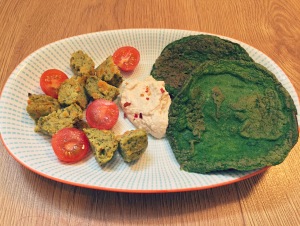
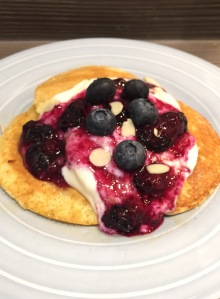
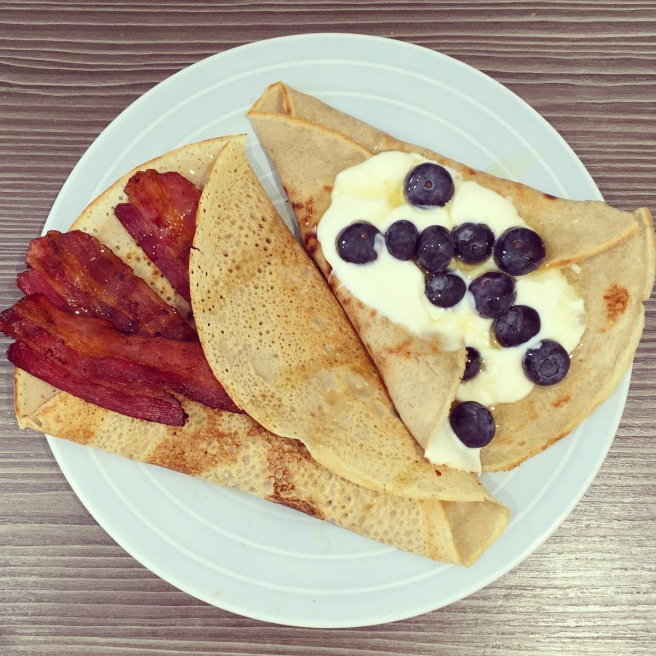
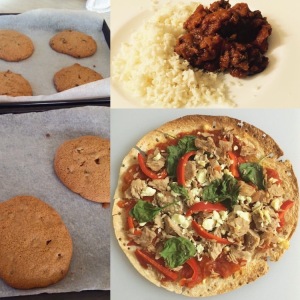
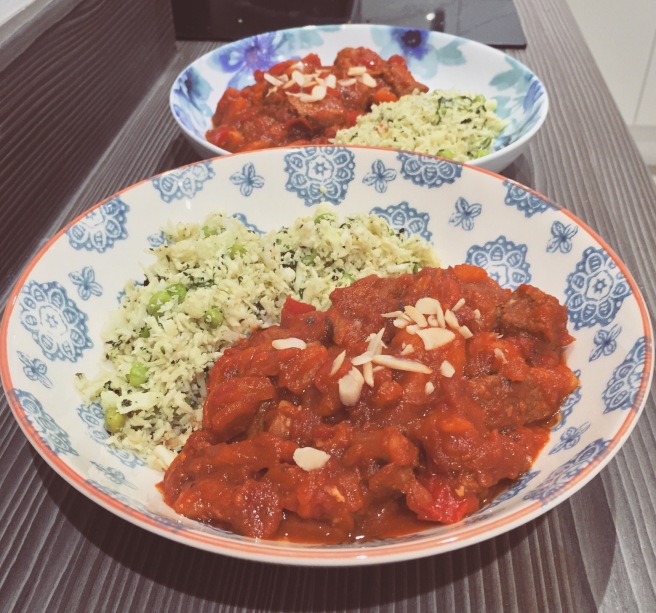
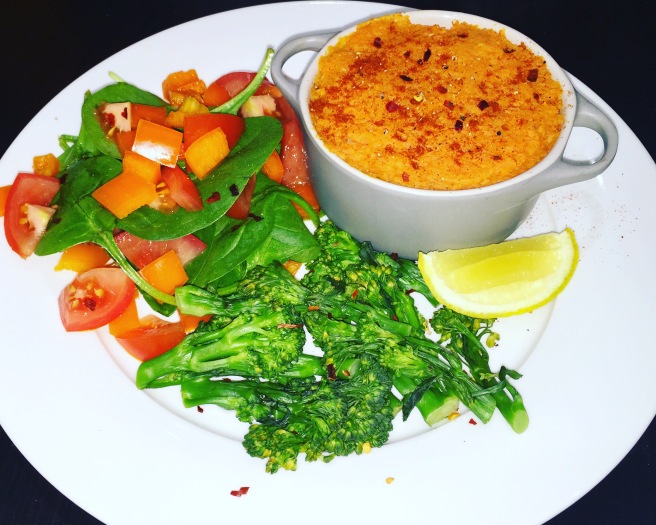
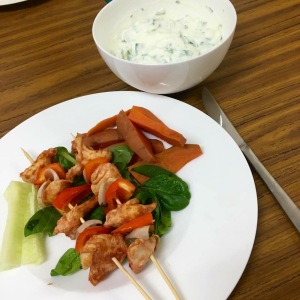
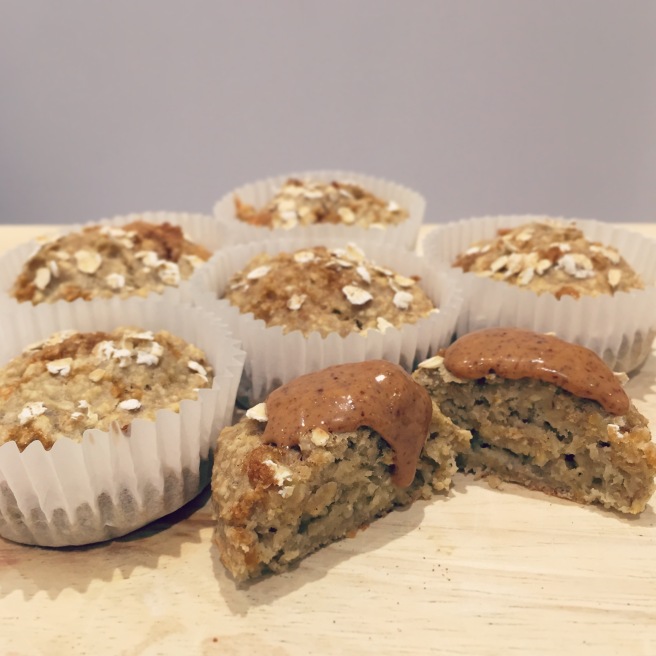
With the leftover prawns, mango and salad ingredients, I managed to put together some other nutritious and delicious weeknight treats & lunches. I’m also loving seeds at the moment and finding lots of new ways to incorporate them into whatever i’m making. Healthy meals on a tight time schedule don’t have to be difficult or fancy! These are some of my favourite make-shift meals from this crazy week:

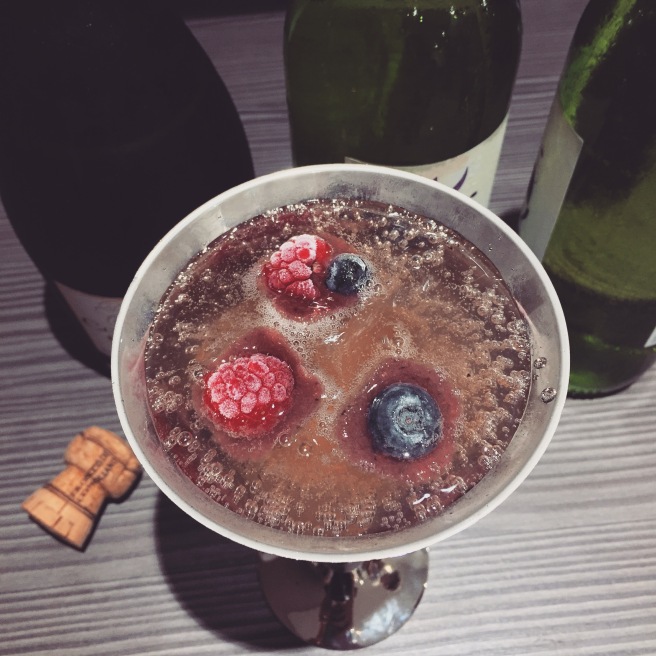
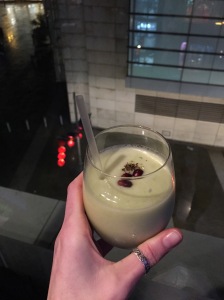
I hope you have a lovely weekend! And if you’re like me this morning, suffering from a post-prosecco hangover, be sure get some fresh air and plenty of water! Here’s a link to a useful post…

Homemade ‘happy hour’: Sparkling Saturday eve’s

Happy hour. Undoubtedly my fave time of day! Those who know me well can always expect our night’s out to involve some sort of cocktail round – whether it’s testing out all of the £2 concoctions at student drinks-heaven The Font in Fallowfield, or sticking to the classic Martini selection at The Alchemist in the city – my absolute favourite. My newest obsession is an espresso martini but I’ll also never say no to anything involving Prosecco, check out these bbc good food easy sparkling cocktails, bakewell fizz sounds amazing! 

IMG_2485

The downside of cocktails, like most of my favourite things, is that they can cost a fortune! And you also run the risk of inducing some kind of sugar coma with all of the syrups involved. So why not recreate your favourites at home – sticking to natural sweeteners and a much more student-friendly budget! I love these really easy blended cocktail-cubes, add them to your preferred drink for a fun way to keep it cool and delicious! All you need is a bunch of your favourite fruit, i’d suggest berries for a strong and sweet flavour (and buying frozen is a good way to save money and keep them fresher for longer!), an ice cube tray and a blender. I recommend making these in the morning so that they have all day to freeze, or even the night before! Here’s mine and the housemate’s Christmas-celebration’s version:

Berry-nice Prosecco coolers:

  • 1 cup mixed frozen/fresh berries (raspberry, blueberry, blackberry, cranberry etc…)
  • 1 tbsp fresh lime juice (or lemon if preferred!)
  • 1 small bunch of fresh mint leaves, torn

IMG_1405

Simply add the fruit, lime juice and mint leaves to your blender, keeping some berries aside for decorative use! Blend until smooth and give it a taste-test, adding more berries for sweetness or lime for sharpness. When it’s perfectly to your taste, pour the mix into the tray, it should fill a standard freezer ice-cube tray, and place your extra berries lightly into each juicy-cube so that they poke out at the top of each one. Freeze for the day and then simply add a cube or three to your bubbly! The best part is how the cubes release more and more fruity sweetness as they melt, as well as keeping your Prosecco nice and coolperfect! 

If berries aren’t your thing, why not try something different! Mango, pineapple, kiwi, passion fruit, orange, strawberry… there are plenty of ways to make this your own! And of course, the cubes can be added to another drink if fizz isn’t on your menu – why not try a gin & tonic with some lime/lemon blended cubes! Let me know your ideas and remember – practice makes perfect – so you’re just going to have to have to keep the drinks flowing and trial your creations!

These make a perfect addition to date night/a night in with your faves, and go far too well with a yummy tortilla pizza – as we discovered last night! Check out the egg on this salmon & veggie creation! And here’s a link to my DIY domino’s for the full treat experience.

12733408_10208778025516660_151999853895880318_n

I truly believe that weekend’s are a time to treat yourself – especially after a long, hard week of routine. There are lots of ways to enjoy delicious and creative meals/drinks without having to end the night with that over-indulged, food coma feeling. One of my favourite bloggers Madeline Shaw is great at coming up with modern recreations of the old classics, that will leave you feeling satisfied and guilt-free. These healthier cocktails aren’t just for Christmas, and will make an amazing addition to your homemade happy hour!

Have a lovely start to your week, bring on next weekend!


Harvey Nichols & Homemade Chocolates: My week of spreading the love

So why is it that I always wake up super early when I’m hungover? As if the fuzzy head and dehydrated skin isn’t enough, but being wide awake before the sun has even made an appearance just does not make sense! Although, I really can’t be in a bad mood this morning as I’ve had such a great week and my tired, achey feet are simply a reminder of how much fun last night was. Even if there were a few too many garden-martini’s involved!

IMG_2176.JPG

The start to my week really set the tone, after attending an evening at Harvey Nichols Manchester ‘Yoga at Dusk’ on Monday, I’ve been feeling really inspired to spread the love and the message that The Well Connected company so amazingly delivered. Throughout the whole evening, every yogi there was made to feel special, loved and totally energiseda class with Charlie Morgan will do exactly this to you. Being surrounded by a such an amazing group of people, all at different levels of experience, got me thinking about why I started yoga in the first place and how far I’ve come since then, in so many ways. I’m working on a post about this too – stay tuned! One of the phrases that Charlie repeated throughout the class really sticks out in my mind – You don’t have to be great to start, but you have to start to be great“. 

I love this. It’s so inspiring and simple and applies to every goal and aspiration you might set yourself, however big or small. This is something that I have been telling myself this week. After a fun and empowering work out, we were each handed the most delicious juice (avo, pineapple, coconut water & pomegranate – omg) and given the chance to try out the Yogandha company’s new line of yoga oils that are meant to improve your practice and your mood – but smell good enough to make me want one as my next perfume! Check out there website for more info on the benefits of yoga oils and other herbal skin treatments. I’m so thankful to Nici Hewitson and The Well Connected for creating such a wonderful evening of yoga overlooking the bright lights of my fave city, I would highly recommend having a look at their future events (a yoga retreat is definitely on my bucket list!) as well as checking out the Harvey Nichols website for more event info.  And if you are lucky enough to live near Charlie’s studio in London, get yourself booked onto one of her classes – your muscles will thank you the next day and you’ll leave feeling super positive and energised.

IMG_2175Now you can’t expect me to be spreading all of this love and not mention the V wordValentines. Whether your’re into it all or not, it’s the perfect excuse to do something nice for someone that you care about! If you’re like me and insist on the ‘no buying Valentine’s day presents’ rule, there’s nothing stopping you from getting creative instead and making something for your fave person/people, and isn’t this weekend just the best excuse to eat more chocolate?

Here’s a recipe for the most intensely delish, home-made dark orange chocolates. I couldn’t believe how much they resembles Terry’s! One of the chocs that I miss the most since cutting down on dairy. But trust me, you are in no way missing out on the chocolate-orangey goodness if you’re like me and can’t have the generic stuff, and if orange isn’t your flavour, you could totally swap it for something like mint, coffee, chili flakes or sea salt! Make it personal, sometimes the best presents are the ones that took time and effort to make, and they’ll never need to know actually how simple & easy these little bites of love are! This recipe is dairy & gluten free, you’ll need something like an ice-cube tray or silicone tray, and I would recommend making these the day before to give them plenty of time to set!

Delicious homemade dark chocolate-orange (DF&GF): (Makes around 20 small chocs)

FullSizeRender (1)

  • 1/2 cup raw cacao powder (I get mine from Holland & Barrett but there are plenty of other places that also stock it)
  • 1/2 cup coconut oil, measured as melted
  • 2 – 3 tbsp honey (add depending on how sweet you like your choc!)
  • zest of 1 large orange
  • little pinch of salt (optional)

Start off by heating your coconut oil on a medium heat in a saucepan. Then stir in the cacao powder and mix well with a whisk. Add in your honey and give it a little taste test to be sure it’s sweet enough! Zest your orange and stir this into the mix – now resist the urge to use as a chocolate fondue – pour the choc into your tray molds and place in the fridge/freezer for at least 4 hours to set! These chocs will technically stay delicious for a week or so, but trust me they won’t last that long! It’s also worth mentioning that they will probably melt quite easily at room temp because of the coconut oil, so keep them refrigerated if you have the will power to not eat the whole bunch in one sitting.

FullSizeRender (2)

Here are the one’s I made for our early Valentine’s celebrations – a little decoration goes a long way! But remember you can totally tailor-make yours, why not try adding in some coconut milk to get a milker chocolate, or even some dried fruit & nuts! Get playful, after all chocolate is not just for Valentine’s day. Have a lovely weekend! Chocolates for breakfast will cure a hangover, right?

Sunny-side-up: Eggcellent lunchtimes

Where has all this sunshine come from today?! I mean, I’m not complaining, but blue sky has been a foreign concept around here lately. It’s amazing how much it can change your mood, I’m feeling a million times more productive studying with natural light streaming through my window instead of the desk lamp, and I’m looking forward to not having to swim to yoga tonight. After a fresh dose of that sunny & crisp air combo’ on my way back from uni this morning, I was craving something light and refreshing for lunch.

Eggs are an amazing fuel – whether they are part of your breakfast, your pre/post workout menu or simply an addition to a delicious, big bowl of love after a long day. My absolute favourite type of egg is a poached one, but honestly i’m awful at making them! The whole swirly water in a pan with vinegar thing is yet to work out for me. So in the meantime, whilst I practice this swirling-poach technique, I have managed to find a rather unique way of getting that lovely, soft poached egg that I love! I’m sure I can’t be the first person to think of this, so let me know if you have tried anything similar that resulted in your perfect poach!

It’s really simple, all you need is:

  • 1 egg (size of your choice)
  • Oil (I used frylight olive oil spray)
  • large square of clingfilm
  • wooden spoon
  • salt & pepper

IMG_2199

Place the clingfilm over a cup, pushing it down into the cup, and spray with oil (or make sure you coat it with a thin layer of oil of your choice. This is essential so that the egg doesn’t stick to the clingfilm once cooked!). Crack your egg into the clingfilm-lined cup. Sprinkle in a bit of S&P. Lift the edges of the clingfilm that surround the cup’s edge and twist tightly to make a little sack that the egg sits in. Remove from the cup and wrap the tail of the clingfilm sack a few times around the handle of a wooden spoon, tight enough for it to hand and stay put without slipping! Boil some water, either in the pan or from a kettle, and fill a saucepan with water on a high heat to keep it bubbling. Add your egg & spoon in when the water is boiling on the hobbalancing the spoon on the edges. Leave this to cook for 6 minutes or more, depending on how soft/hard you like your egg! When you remove the spoon, unwrap the egg and slice open to reveal your yolk! If you’re like me, a golden, gloopy center is perfect!

You could serve your egg over toast, with beans (baked, edamame, butterbeans, chickpeas), with soldiers (wholemeal bread, pitta, veggie sticks), with smoked salmon, on top of a salad, or with whatever you fancy! One of my favourite post-workout lunch bowls is quinoa, king prawns, edamame beans, sweetcorn & spinach – topped with a gorgeous poached one! The runny yolk adds a creamy texture and with a little seasoning of S&P, and of course a generous sprinkle of chili flakes, this truly is one big bowl of love. Here’s mine today:

IMG_2204.JPG

But as I mentioned before, the possibilities are endless when it comes to adding eggs into your meals, don’t forget about the omelettes, scrambled, and hard-boiled goodness too! Here are a few of my fave eggy-meals:

IMG_2212.JPG

I hope the sun is shining wherever you are! Even if you’re like me and stuck inside writing up lecture notes, but hey – there are worse places to work.

FullSizeRender

Have an eggcellent week!

Pancake day, 4 ways! (GF&DF)

Pancakes have got to be one of the best foodie creations of all time. Whether you love yours sweet, savoury, fluffy, thin, small, big, rolled, folded, topped with bacon or smothered in syrup – I truly believe that there is a pancake for everyone! For those of us who avoid dairy & gluten, it would be easy to give up hope of ever having delicious treats like pancakes and crepes again because of the milk/flour content of standard recipes. But with a few simple substitutions there is no reason at all to miss out on the all the pancakey-goodness! And in my opinion, these recipes are in no way inferior to the old-fashioned pancake and are a great way to get more creative in the kitchen!

So pancake day is finally here, and this weekend I wanted to experiment with some different styles of DF&GF pancakes. The results of my little kitchen venture have inspired me to never again restrict pancakes to one day of the year! It’s super quick and easy to go online and find a million different, more tummy-friendly, recipes – but sometimes you just have to get a bit creative. This brings me to my first trial, the rather odd looking but delicious savoury one of the bunch, my super-green spinach & coriander pancakes with hummus. These pack in so much nutrition and are wonderfully simple, a really fun way to have a greener lunchtime. I enjoyed mine as 2 smaller, thicker pancakes with hummus, cherry tomatoes and falafel – but you could also spread the mix further in the pan to create a more crepe-like pancake and roll it up with some more gorgeous grilled veggies.

Super-green spinach & coriander ‘pancakes’: (makes 2 small or one large)

IMG_2100

  • 1 big handful of fresh, washed spinach
  • 1 handful of fresh coriander leaves
  • 1 tbsp lemon juice
  • 1 large egg
  • salt & pepper
  • hummus (optional- to serve)
  • dried chili flakes (optional)
  • 1 tsp coconut oil (for the pan)

Simply add all of the above, except hummus, to a blender and blend on full speed for around 30 seconds until the consistency is smooth and all of the leaves are blended. The egg will make it a bit frothy so let the mix stand for a bit to get rid of some of the bubbles! In a frying pan, melt the coconut (or other oil of choice) on a medium heat. Pour in that glorious green mix and spread around the pan, let it cook for a minute or two on one side and use a spatula to lift the edges and check if the underside is done. If you’re brave enough to flip – now is your time! Cook the other side for another minute or two, depending on the size of your pancake. Repeat with the rest of the mix if you are making 2 smaller ones. Serve with hummus, chili flakes, fresh lemon, minty tzatziki dip, refreshing avo-salsa, veggies, meat or anything else you fancy!

Next up are the sweetest, fluffiest and yummiest little pancakes on the menu! Almond flour is a high protein, low sugar, gluten-free flour alternative that promotes healthy fats and lots of vitamin E, as well as a nice dose of magnesium. But just as importantly, it tastes delicious in pancakes and gives that fluffy, american-style texture, perfect with berries and yogurt or bananas and honey etc…

Fluffy almond flour pancakes: (Makes 2 servings, 3 pancakes per serving)

FullSizeRender (1)

  • 2 large eggs
  • 1 tbsp maple syrup
  • 2 tbsp coconut oil, melted (plus extra for pan)
  • 1/4 cup almond milk (or other milk of choice)
  • 1 cup almond flour
  • 1/4 tsp baking powder (optional – extra fluffiness!)
  • pinch of salt
  • toppings of choice (e.g. berries, yogurt, honey/agave, nuts, coconut, fresh fruit, cinnamon, chocolate, nut butter etc…)

Add to a mixing bowl the flour, milk, eggs, syrup, oil and salt – whisk carefully until all of the dry and wet ingredients are well combined. The consistency should be pourable but not runny! In a pan melt enough coconut oil (around 1 tsp) to coat the bottom, and keep on a low-medium heat. These pancakes cook much more successfully on a low heat for longer – so add some batter to the pan and cook the pancakes for around 4 minutes on each side, carefully lifting the edges to check the undersides. Once they are fluffy and golden, serve with the toppings of your choice – I had mine with some heated up blueberries, coconut soy yogurt, flaked almonds and a drizzle of agave nectar – delicious. You can store these pancakes in an airtight container in the fridge for the next day, and simply pop them in the toaster to enjoy them warm again!

Now onto my personal favourite – the buckwheat variety! I love how these crepes are so flavour-versatile and go perfectly with both sweet and savoury toppings! As a weekend morning breakfast treat, we tried out both crispy bacon & maple syrup and sweet berries and yogurt versions. A pancake themed main and desert all before 11am, the perfect Sunday! I used Livia’s Kitchen buckwheat crepe’s as the basis for the recipe, but with a few modifications, so i’ll post mine below but here is the link to the original. Livia is an amazing food-blogger and her instagram has me drooling most days. These gorgeous, wheat free crepes are really easy and the pancakes can be stored in the fridge for the next day too, although you may need to hide them from hungry housemates!

Perfect morning buckwheat crepes – 2 ways! (Serves 2, 3 crepes per serving)

  • 3/4 cup buckwheat flour (around 100g)
  • 1 large egg, whisked
  • 1/2 tsp vanilla
  • 3 tbsp maple syrup
  • 1 cup almond milk (or other milk of choice)
  • 1/2 tsp cinnamon (optional)
  • pinch of salt
  • coconut oil for pan (or other oil of choice)
  • To serve: 6 rashers (3 per serving) of streaky bacon + 2 tbsp maple syrup, or 1/2 cup blueberries + 1/2 cup yogurt of choice, or any others of your fave toppings! 

Add buckwheat flour to a big mixing bowl and combine with milk, the whisked egg, vanilla, maple syrup and salt (and cinnamon if you choose to add this delish flavour into the mix! Works best with the sweet topping version). Give it all a good mix until smooth. Heat a little coconut oil in a medium/large pan so that it evenly coats the bottom and put on a medium heat. Add some of your batter to the pan and spread with the back of your spoon so that it thinly covers the entire base – we want lovely thin crepes!) If you are having bacon with yours – now would be the time to start grilling/frying! Cook each side for around 2 minutes, checking the undersides and flipping when you think there is enough colour, ideally a golden brown. To keep the crepes warm you could place a heat-proof dish in the oven on a low heat and keep adding fresh crepes to it whilst the next one cooks. Now you can serve, in any style you want! Feel free to explore with folding, rolling, slicing the crepes to suit your toppings! I folded mine with some extra crispy bacon and maple syrup, absolutely dreamy.

IMG_2149.JPG

Get creative with your toppings this pancake day, whether it’s fresh fruit or scrambled eggs affair, make it fun and make it your own! And if you dare to flip, don’t beat yourself up over a few ceiling-stickers! Another method I would love to try again is the ever so simple ‘1 banana & 2 eggs’ variety, but I must confess that I gave these a go and the outcome was a rather sad looking, burnt excuse for a pancake – so let me know if you have tried and succeeded at this, I would love to know your secret! Meanwhile, I think in my house pancake day is going to become a weekly event with these 4 fun ways to enjoy them. Happy flipping!

P.s – check out some of the gorgeous food pics I was sent this weekend – recreations of my fakeaway tortilla pizza, sweet lamb stew and gooey choc chip cookie recipes, all looking delicious. Find all of these recipes on here, and for more foodie inspiration be sure to stop by my instagram, have a lovely week!

FullSizeRender

Rainy weekend lamb stew & tasty cauliflower-rice

It’s raining, it’s cold and it’s already dark by the time you get home – perfect! This happens to be an ideal excuse to curl up on the sofa in your pj’s for an eve of back-to-back viewings of your fave netflix series. But instead of caving to your cravings by stopping at the shops for a microwave meal, or simply working your way through a family sized pack of doritos for the night, why not nourish yourself with a big bowl of warm, homemade real food. I often post my ‘#bowloflove’ on instagram, these are those one-bowl, delicious, comfort food classics that are just what the doctor ordered, and here’s one that I just had to share!

Cauliflower rice is a delicious, lower-carb side dish for a big bowl of warming winter stew, ultimate comfort food! The stew recipe is inspired by one of my absolute favourite food bloggers, Madeline Shaw. Her ‘Moroccan lamb stew with apricots’ is hearty and sweet and full of goodness to revive you from a hard week, and it packs so much flavour for such a simple list of ingredients! I made mine to serve 2 – with a few modifications – the version of which i’ll post below. Here’s the link to Madeline’s. It’s dairy & gluten free but most of all, delicious. Ps – She just liked my instagram pic and i’m totally fan-girl’ing.

Whoever came up with cauliflower rice needs some serious recognition! It’s such a simple and creative way to reduce your carb intake, compared with standard fried rice side dishes, and totally versatile when it comes to flavour. Serve it with curries, meat & fish dishes, stir-fried veg, stew and so much more! A great ‘fakeaway’ recipe to add to your collection.

Cauliflower-rice with peas & coriander: (Serves 2)

  • 1 head of cauliflower, cut into florets
  • 1 tsp coconut oil (for the pan)
  • juice of 1/2 lemon
  • 1 cup petit pois (I use frozen, thawed)
  • 1 big handful of coriander, finely chopped
  • salt & pepper

If you don’t have a food processor, get one, you can definitely use a grater to get that rice-like texture! Grate/process the florets of cauliflower and place into a big mixing bowl. Add the lemon juice, peas and coriander and give it a good stir! Add S&P to your liking, and even some cheeky chili flakes! In a saucepan, melt the coconut oil (or other oil of your preference) on a medium heat, then pour in your ‘rice’ and give it a minute or 2 to heat through. Before it starts to stick to the bottom of the pan, stir the mix for a further 5-8 mins whilst the cauliflower cooks. Then give it a taste test and when you’re ready to serve, sprinkle over a few torn coriander leaves! By all means make this your own by adding in any veggies/spices/herbs that you love, and you can easily double up the recipe to feed your hungry housemates too! The flavour of the coriander also works really well with lime, so if your fridge is more likely to be stocked with the gin&tonic essential, feel free to use a lime instead of lemon – but I would recommend using fresh juice rather than bottled!

This refreshing side-dish worked so well with the gorgeous Moroccan sweetness of lamb & apricot stew, without the dreaded carb-coma. If meat isn’t on your menu, you could always experiment with using chunky vegetables such as aubergine, butternut squash or pumpkin in your stew! Here’s how I made it:

IMG_2113.JPG

Sweet Moroccan lamb stew: (Serves 2)

  • 200g (mine worked out to be half of a pack) extra-lean diced lamb
  • 1 small tin chopped tomatos
  • 2 tbsp tomato puree
  • 1/2 white onion, chopped
  • 80g (2 small packets) dried apricots, cut into small quarters
  • 1 red bell pepper, chopped
  • 1 tbsp cumin
  • 1 tsp paprika
  • 1/2 tsp cinnamon (optional)
  • 1/4 cup flaked almonds (optional to serve)
  • 2 tsp coconut oil
  • salt & pepper

Make sure your lamb is diced into bite-sized pieces and rub in the paprika and cumin spices so that it is evenly coated. Set aside in the fridge whilst you prep your veg & apricots! Once you’ve finely chopped your peppers and onion, brown the onions in a large saucepan/cooking pot with a tsp of coconut oil (or other oil of your choice). Now add in your peppers, chopped tomato, tomato puree and apricots and give the mix a good stir. Season with S&P. Before throwing away the can that your chopped tom’s came in, fill it with water and add this to the pan – the excess water will help give the stew the desired consistency after it’s slow cooking time. Turn the heat to low. In a separate pan/griddle, brown the meat on a medium-high heat with another tsp of coconut oil for a minute or two, smell those gorgeous spices! Now you can add in the lamb to your stew pot, give it a good stir and place the lid on. Leave for as close to 2 hours as you can, the beautiful taste and texture achieved by slow cooking the lamb in the stew is totally worth the wait!

Be sure to prep any side dishes in this time, such as the yummy cauliflower rice, or maybe some steamed green veggies, flat breads or quinoa/couscous – all of which are super simple and quick to prepare – so there’s still time for one more episode! Before you serve, turn the heat up slightly and stir through. Sprinkle over some fresh coriander or almond flakes for a real Moroccan-inspired bowl of love.

Let me know if you love these recipes as much as I do, and any modifications you make/can think of! So this week I finally found my balance in a headstand, the coolest feeling. But the best feeling in the world was when a friend of mine called me to say that with the help and motivation of my blog, she has been working on become a more nourished and healthy version of herself, and she is so ecstatic to have lost a whole stone in weight already this year – but I am even more happy for her for what she has gained. She sounded like a totally new person, so much more positive and cheerful and I could tell that this wasn’t her talking about a ‘diet’ but a total lifestyle change. It doesn’t have to be drastic or a chore, just making simple substitutions in your every day diet and exploring some delicious, healthy alternatives can change your entire attitude towards your food and lifestyle. I’m so proud of her! 

IMG_2075

The insomniac’s menu: My easy fish pie & other remedies

When it comes to student stereotypes, there are 2 well-earned ones: the “I sleep whenever and wherevercan” and the “I’m nocturnal and scared of daylight”  students. But what if, like me, you’re in category number 3 – awake all day and all night, with nothing but your laptop getting any kind of ‘sleep mode’.

I remember sleep…but I can’t remember the last time I slept through the night without waking up at least twice thinking it’s the morning, only to be disappointed and blinded by my phone, who tells me it’s 3:17am and I have full lives on candy crush. Lately I’ve been getting so frustrated about being awake at these times that I have even tried getting out of bed and making a start on tomorrow’s to-do list. Surely a better way to spend my time than losing count around sheep no.250. But as productive as having all of your washing done and dried by 7am may be, I’ve been starting to worry about the effects of having such a disrupted sleeping pattern.

The National Sleep Foundation recommends between 7 and 9 hours of sleep for a young adult – I wish. So since this is just not happening for me, i’m going to concentrate the rest of this week on trying to improve my sleeping habits – going back to basics and starting with my bedtime routine. One of my favourite bloggers, and all-round healthy lifestyle guru, is Madeline Shaw, be sure to check out her website as it’s full of amazing lifestyle advice and delicious recipes. Her post ‘My top tricks to beat insomnia’ click here, suggests not eating past 8:30pm and getting into bed by 10pm. Here’s somewhere that I can definitely make a start! This week i’m going to curb the late bedtimes, dinners and midnight revision snacks – because although it may seem like common sense, these habits are easy to make but tough to break! I’ll make sure to post the outcomes of my attempt at this new routine, hopefully my journey to finding a better night’s sleep will help out whoever is reading these posts and also belongs in that exhausted third category.

So what can I do to give myself the best chance at a good night’s sleep? Something that I find really affects my mood before bed is a tidy room, i’m lucky to have made my room into a complete relaxation den, but when there are clothes/books lying around I definitely don’t feel at home! I also appreciate the little additions of fairy lights and other warming, homely comforts such as pictures, candles and comfy bedding. These make the world of difference when it comes to creating a comfortable and chilled out environment, especially when it’s your first time away from home. 

IMG_0400

In general my weekdays are kept pretty busy – it’s how I function best, so the most frustrating part of it all is feeling like I should be more tired than I am by the end of the day! So if you’re anything like me, you’ve tried the early nights, no phone before bed and reading, but despite all of this…no luck. Maybe it’s worth considering what is keeping our brains so active at night and the processes that our bodies are going through whilst we should be sleeping, a particularly important one being our digestion. Could there really be foods that aid sleep? This is another question that I’ve been looking into recently. I found this article quite amusing, obviously coffee and energy drinks aren’t going to be on the ‘best foods for sleep’ list, but it did give some interesting suggestions. From what I have read online so far, foods containing complex carbohydrates, fish, dairy (although no good for me!) magnesium and potassium are your best bet when it comes to your last meal of the day. These foods contribute to easier digestion so that your body can focus on winding down for sleep, rather than digesting stubborn/large quantities of food. Simply including wholegrain rice in your dinner, bananas in your dessert and a warming milky drink to finish the evening could be really beneficial to your sleeping dilemma, and there are plenty of alternatives! Another really popular suggestion is soothing chamomile or peppermint tea before bed, both are delicious and naturally caffeine free so it’s all down to personal preference.

This has inspired me to share my really easy Fish Pie for 2 recipe, using sweet potato as our complex carb topping for a delicious and nutritious comfort meal. The tuna and sweet potato make a great combination, and who knows – it could even make a difference to our sleeping patterns!

A Simple Fish Pie: (Serves 2)

IMG_0788

  • 2 large tins or pouches of tuna, drained
  • 2 medium/large sweet potatoes
  • 1 can of sweetcorn, drained and rinsed
  • 1 can/1 cup frozen petit pois
  • 1 tsp dried chili flakes
  • 1/2 – 1 tsp paprika
  • 1 tbsp almond milk (I use for DF, you can use your milk of choice)
  • juice of 1/2 lemon
  • salt & pepper
  • 1 tbsp tahini (optional- adds creaminess) 

Preheat oven to 180°C (fan). In a large bowl mix together the tuna, peas, lemon juice, sweetcorn (optional tahini) and season with S&P. Spray/drizzle an oven-proof dish with olive oil and scoop in your filling making an even layer that covers the bottom of the dish. Set aside and peel the sweet potato, chop and add to a pan of boiling water with a pinch of salt, and boil for around 15 mins, until the chunks are lovely and soft.

Whilst your potato is boiling you could prepare your sides! I would suggest serving wish fresh green veggies like long-stem broccoli and asparagus, and some lemon wedges.

Now you can drain the water and add in a splash of almond milk and some paprika, then mash until smooth – a good pre-dinner workout! Be sure to give the mash a taste test and add any seasoning that you fancy! Spread that delicious sweet P mash over the tuna layer of the dish, again evenly covering the area, and sprinkle over a few chili flakes. Let this bake in the oven for 20-30 mins. Feel free to totally make it your own, maybe add some cheese or herby toppings to the pie, or play around with using two small oven dishes rather than 1. And if tuna isn’t your fish, you could definitely use salmon, cod or experiment with your own ideas – fishy delishy! 

Something i’d like to quickly mention is that sleeping troubles can often be the result of anxiety and stress, but these everyday worries that we carry with us aren’t worth the negative effects to our health. Maybe something from your day is playing on your mind before you go to bed, something someone said or how something made you feel, try to remember that worrying about it when it’s late and dark makes everything seem worse. A really effective method for dealing with anxiety is to allow yourself ‘times of worrying’. Literally allocate a specific part of your day, no longer than a few minutes, to simply worry – but then let it go. So that when you next feel that panicky feeling coming on, you can remind yourself that it isn’t worth your time and energy in that moment. More on this type of CBT (cognitive behavioral therapy) can be read online, here’s an interesting link, and don’t forget that there is always someone that you can talk to. This is a post-in-progress and I will make sure to keep my blog up to date with how i’m getting on and what I find helps. I’d love to know what you come up with, and any thoughts/ideas you have about eating your way to sleeping soundly. So keep me updated too – I’m still loving all of the pictures I’m being sent, this week one in particular looks seriously delicious, check out this recreation of my turkey & pepper skewers with homemade tzatziki!

FullSizeRender

Sweet dreams! 

Makeshift-Monday banana & oat mini muffins

There’s something impossible about a Monday morning, especially when it’s your first day back into semester 2 lectures and you’re in for 9am. Then, after being back for only just an hour, being set an online test due 9am tomorrow morning – as if! And to top it off, my timetable leaves me a 6 hour gap between lectures. So it’s fair to say that this morning I woke up feeling somewhat uninspired by my Monday schedule. But sometimes you have to remind yourself to make the best of the situation, and by that I mean make something delicious. 

One of my pet hates is wasting food, and in particular fruit & veg as it tends to go off quicker than I can use it up! I hadn’t had the chance to do my food shop for the week yet, and I was running dangerously low on bananas – a position I do not like to be in – and I couldn’t bring myself to throw away the slightly overripe one that I had left! But then I remembered that bananas at this stage in their ripeness (that must be a word?) are perfect for baking with as they are deliciously sweet and easy to mix. So after a quick cupboard sweep I decided to throw together a quick and healthy bake before heading back into uni. It took me 20 minutes in total and it’s such a simple recipe using only a few ingredients, that can also be gluten & dairy free! Bear in mind that I have totally improvised on the ratios, so i’m sure that my next experiment with this recipe will turn out slightly different, perhaps even tastier, but i’m actually really pleased with how these mini muffins turned out! If you decided to have a go at this recipe, let me know if you modify/improve it – I would love to hear any suggestions.

Banana & oat mini muffins: (makes 6 mini muffins)

IMG_2035.JPG

  • 1 cup ground rolled oats (Use GF if necessary, I put mine in a food processor but small rolled oats may work!)
  • 1 tbsp coconut oil, melted
  • 1 egg
  • splash of milk of choice (I use DF almond milk)
  • 1 tbsp maple syrup
  • 1 tsp brown sugar (optional – to sprinkle on top before baking)
  • 1/4 tsp baking powder
  • 1 very ripe banana
  • pinch of salt
  • 1/2 tsp cinnamon

Preheat oven to 160°C (fan). Mash up the banana and add into a mixing bowl. Combine with the ground oats, baking powder, salt and cinnamon before adding in your wet ingredients gradually. Mix well, a wooden spoon works better than a whisk for this one! Put 6 cake cases into a tray and fill each one evenly, the muffins will rise but not by too much so don’t be afraid to fill the cases to near the top if there is enough mix! Before baking, sprinkle some oats and brown sugar on the top – or get creative by folding in some blueberries, topping with banana slices or sprinkling on more cinnamon before placing in the oven. Let the muffins bake for 10-12 mins, then take out and test with a sharp knife to see if it comes out clean. They may need another minute or two depending on the size of your cases – but don’t over cook them as they are most delicious with a slightly moist center! Take the tray out when they are golden and gorgeous, and leave on the side to cool – give them some time to really bind as they cool. Store in an air tight container in the fridge to keep them for longer!

Me and my housemate waited as long as we could, a whole 5 minutes, before tucking into one topped with a big dollop of almond butter – I would highly recommend! These are perfect to take on the go as an easy & quick energy boost, the oats will keep you fuller for longer as a slow-release energy source, and the natural sweetness of the maple syrup and banana are sure to satisfy your mid-morning cravings. You could also try doubling or even tripling the recipe to make more, as i’m certain that 6 won’t last long! And be sure to try your own variations, you’ll be surprised at what you can create with just a few simple, natural ingredients. Unfortunately tomorrow’s timetable doesn’t include a baking interval, wish me luck.